Monthly Archives: July 2011

Compost – I love it!

There’s always been a compost heap in the garden – right from the time I was very small so I’m amazed when I hear people saying “Oh I wouldn’t want a compost heap – they’re mucky or they attract rats and they’re ugly” – I really get quite agitated and find myself preaching the benefits of composting with almost evangelical zeal.

What you get from good compost is a really valuable nutritionally rich material to add to your garden. It adds structure to your soil and improves the pH balance. It’s a great way to recycle kitchen and garden waste and reduces the amount we send to landfill.  And it’s free….which has to be good, and it’s a darned sight easier than carting big bags of mulch and expensive compost from the garden centre.

So having said that how do you go about it? Well you can start with a heap – literally. That’s what we had at home and it was just a big pile in the corner. As more was added to the top we dug out the rotted material from bottom to use. It does work but that can get a bit messy and it’s certainly the slowest method. There are lots of ways of keeping the compost more tidy, and different kinds composting systems to speed up the process. For me it’s a 2 bay compost heap made up of old wooden pallets. If you take 7 pallets and make two squares of the pallets, securing them in the corners you end up with two ideal spaces to make and store the compost. If you have less space there are compost bins readily available to buy which work just as well. Or if you want something more cutting edge there are compost tumblers which you rotate and wormeries supplied with worms ready to get going, both of which speed up the process.

My dad would have been amazed at how much there is said about how you should make a compost heap and what you should put in it. I seem to remember he just chucked all the vegetable matter from house and garden on it and that was that. But if you’ve never made one before there are some key do’s and don’ts.

Don’t add:

  • Meat or meat products
  • Fish
  • Milk, cheese or any dairy related products
  • Cooked food whatever it is including vegetables
  • Really woody or thick prunings which would be hard to break down (although you could shred them)
  • Citrus peel
  • Perennial weeds
  • Cat litter

Do add:

  • Vegetable peelings and fruit peelings (ex citrus) etc from the kitchen
  • Tea bags/leaves and coffee grounds
  • Grass cuttings
  • Annual weeds – although best not to use those with ripe seed heads
  • Waste paper (preferably shredded)
  • Old bedding plants and your cut down herbaceous plants
  • Dead cut flowers from the house
  • Any other exhausted plants from the greenhouse or your garden
  • Egg shells
  • Autumn leaves
  • Old compost from pots either from the house or garden
  • Thinner prunings although best shredded

Be careful about adding diseased plant material to the heap. Some blight and club root affected plants should not go into the heap, but tomato blight (which I seem to get at the end of most seasons) will be gone by the time the old tomato plants have broken down, but if in doubt leave it out!

There are methods of adding material to your compost heap which can make the process quicker. I try not to add thick layers of grass clippings, leaves or shredded paper which can turn into a solid block in the composter. I fill up the first bay of my 2-bay pallet contraption. Then once it’s full you could empty it out, mix the contents really well and then put it back into the bay adding water between layers as you go. The heap will warm up as it composts. A couple of weeks later you can repeat this mixing step, watering again if the heap has become dry. The mixing action will introduce air which helps the composting process and can mean that you could have a finished product in a little as 6-8 weeks.

Whilst all that is going on in one bay I still have another bay to start all over again.

I must say I tend to just leave mine to compost naturally which can take up to 12 months, but I will check to see whether it’s too dry and if it is add some water. Cover the tops of the bays with a square of old carpet to keep the material in and keep the worst of the weather off.

When you have a rich brown crumbly material you’ve made really good compost, and once it goes brown and everything is well rotted you can assume the compost is ready. I have had compost which still has bits in it, which have rotted, but just not broken down finely. You could use that as it is or you could sieve it so that it is fine, or just put the bigger bits back into the compost to rot down further.

There are commercial accelerators available which you mix into the heap and which are made to speed up the whole thing. I haven’t seen the need to use one but you could give it a go.

And what to do with it after all that? Depending on where you’re putting it either you can use it as a mulch on established beds, or dig it into empty beds. You can also top dress pots and mulch around fruit trees and bushes or if you want to get really clever you can start mixing in other ingredients and make your own potting compost.

So if you can don’t put it in the bin, put it on the compost heap.

Leave a comment

Filed under Garden, Uncategorized

Soft colours for a new border

I planted up a nice little border this week in Leeds.   It needed a rework.   The established beds had been planted up some years ago and over time plants had disappeared and my least favourite thing – bindweed had been gradually creeping through what remained along with its best friend the couch grass.  I really loathe bindweed.   Its such a nightmare to kill off and it doesn’t matter how much you dig you are bound to leave a bit somewhere and so off it will go again.  However, I’ve written about bindweed before though so I shan’t rant again.

So a lot of digging!  And on the left of the border geranium Johnson’s Blue had got out of hand.   Its got a lovely blue flower early in the year but then it doesn’t do much at all and it keeps increasing in size year on year unless you keep it under control, only its pretty early flower has saved it here but very much reduced to a shadow of its former self.

The newly planted border looks a bit thin (I hope you can tell which is which!) but come back next year and I promise it’ll be full of flower and colour.   The client wanted soft colours, pinks, mauves, whites and blues and lots of flowers with a reasonably long season so in the border are a range of fairly easy plants, phlox, iris, campanulas and grasses….which aren’t doing a lot at the moment – as well as verbenas, ecinacea and sedums, which will be in full flight any minute and continue right into the autumn, and a nicely scented English rose which should flower all summer long with a lovely verbascum which is flowering right now.  There were already alliums in the bed which will now come through the new planting, and on the fence, though tiny at the moment, I’ve planted a white Japanese quince which should cover the panel with flowers in the early spring and then have fruits later on.

Because there are steps up through the border I’ve put in some Mexican Fleabane (erigeron karvinskianus) alongside and hoepfully it’ll self seed between the stones.   I think its probably my favourite plant this week…..ummm or maybe not, maybe it was the verbascum Pink Domino….

At home we’ve installed a scarecrow in the garden to fend off the fox.   The wretched thing took Elsie almost a fortnight ago and so having Googled all things anti fox we came up with either electric fencing (ouch what about the cats?), male urine (so poor son is banished from the bathroom) and a fairly quick fix, Sam the Scarecrow.  This is all well and good but he keeps making me jump!  Let’s hope that he makes the fox jump too.  I must get it into my head that Sam lives here too now.  Somehow I suspect that  this may not be the end of it and so my search for the perfect solution will continue.

Leave a comment

Filed under Chickens, Flowers, Garden

Wittering and Twittering

I think I am developing an unhealthy Twitter habit!  I’ve been taking part in Reach Further’s #12dot (12 Days of Twitter) and have learnt all sort of stuff, but now, whatever I do I need to tweet it…  Not sure I can write anything that’s any longer than 140 characters but let’s have a go.

Lovely wedding on Friday – very pretty bride, beaming groom and the flowers weren’t bad eitherWeather was brilliant too which is remarkable since it’s done nothing but rain since.    I know we all pray for good weather but it isn’t the best for the flowers, you get them from the market in tip top shape and then you try to keep them that way….

As usual the Mustard Pot made a lovely venue and the couple had filled the garden with fun things to do – hoopla, 10 pin bowls, and amongst other things limbo.  Didn’t hang around to see the bride do that in her frock!  And inside they’d collected dozens of pretty china cups and saucers for coffee after dinner which went perfectly with the simple jugs and jars of pretty country flowers

The theme was vintage/country, so lots of seasonal flowers, nothing too stuffy.   The pew ends were simple bunches tied with raffia which we lifted with the pedestal and moved down to the pub for the reception.   Makes sense to get double the use from your flowers where you can.

Of course there had to be roses, in the bouquet were Avalance and Akito roses with gyp, white lisianthus and freesia, and variegated pittisorpum and the bridesmaids’ posies were simple but with blues and violets to match their dresses.

And after all that loveliness I had to find a way to get 19 half barrels from Knottingley to Leeds.   Man with Van was great, but we still had to stuff 3 of them into my car, talk about the sublime to the ridiculous.  But they got there and they look good as well.  I took a photo when they arrived, oozing the smell of booze over the garden but I failed to take one when I’d done.  I suspect I’d seen too much of them by then.

Quite glad of the rain today really – at least I can’t dig anything or plant anything, hooray I get to stay inside.   A little light plant ordering is on the cards I think.  Oh careful the sun’s coming out….

and if you want to know where all the wittering and twittering is find me @MaggyAnne, see you there maybe?

Leave a comment

Filed under Flowers, Garden, Uncategorized, vintage, wedding

I say tomato…..

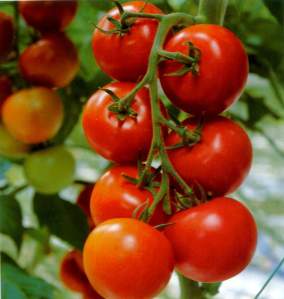
This last few days I’ve been spending time in the greenhouse with my tomatoes….sad I know, but I enjoy watching them grow and anticipating the first fruits.  Won’t be long now I hope!

A great deal is said about growing tomatoes – they take pride of place on the show bench at the autumn plant and produce shows and there are growers across the country who pride themselves on the biggest, the roundest and the most perfect specimens, but for me tomatoes are one of the easiest fruits/vegetables and also one of the most tolerant and rewarding to grow.

In Mediterranean countries tomatoes can grow like weeds they are so quick to germinate, and here with only a very little help you can have a great crop for not too much effort.

Like potatoes, which they are related to, tomatoes came to this country following the colonisation of South America. The Spanish distributed them widely throughout their colonies – everywhere from the Caribbean to the Philippines, and they rapidly became a common part of the global diet.

Remarkably there are around 7,500 varieties of tomato grown across the world, and so there is most definitely one for your garden or greenhouse!

They come in almost every colour, size and flavour available to grow from seed, so think about what you like and where you will grow them and go from there.

I always grow something easy and reliable and then something I’m not familiar with to add interest each year. This year I’ve got some Gardener’s Delight as my easy to grow type. They are cherry tomatoes and they grow almost too well. They need to be kept in check a bit though because they can become enormous.

My dad always grew Moneymaker. They are a reliable and well known variety and I have fond memories of them, but this year I’ve chosen a beefsteak tomato.  I love them and hopefully whether we get a great summer or not they’ll remind me of hot Mediterranean summers as they ripen.  I haven’t really been successful with beg beef tomatoes in the past though.   They become very heavy and so the plants need a lot of support and I’ve had blossom end rot as well so I’m going to be more careful if I can.

Every year there seems to be a glut of fruit at the end of the season and so if I have lots of plum tomatoes I’ll be able to make and freeze masses of tomato sauce. And, of course, there has to be chutney which I can make with whatever else I have in abundance.

Growing Tomatoes

So, back to growing. All varieties will respond to the same treatment to start them off and March is a good time to sow in a greenhouse or a light windowsill. Sprinkle the seed evenly over compost and put a layer of vermiculite over them or more compost in a fine layer. Then water and put a propagation lid over them, or a plastic bag, and let them germinate. As they come through take off the cover and keep them watered. Once they develop about 3 pairs of leaves they can be potted on into little individual pots. Plant them quite deeply and keep them in the greenhouse or indoors.

For outdoor varieties you can harden them off from mid to late May by taking them outside every day and bringing them indoors at night until they are ready to be planted outside. I generally do this for a week or so.

If the plants are to go into pots you need something big – at least 8-10 inches wide. Or they can go into growbags or direct into the ground if they are going into the veg patch. When you do plant them on again make sure you plant them deeply. Tomatoes keep growing roots around the base of the plant and will be more stable if they are planted well into the soil or compost.

Taller upright varieties will need support. Put a cane in each pot and tie the plants in as they develop. Some varieties will grow up to 4 or 5 ft high with no difficulty at all.

They need regular feeding and watering to make sure they develop well. Water every day, you can use up to half a watering can per plant, and feed with tomato food once a week or you could use my homemade nettle goo!  More of that another day I think.

If they’re in the greenhouse make sure you water and check the plants often because, especially in the summer, the heat can dry them out quickly.

If you’re growing a bush variety in pots and baskets they don’t need much aftercare. But the majority of tomato varieties will need pinching out and stopping.

As the plant grows the flowers appear in trusses which will develop into the fruit. In between the branches at this time the plant will try to produce extra side shoots and they need to be pinched out so that the plant can concentrate its efforts on developing the fruit and not producing lots and lots of leafy growth. Keep going back and doing this regularly because the plant is just programmed to keep producing these side shoots.

Then once the plant has about 7 trusses you should stop the plant by pinching out the top of the plant.

Depending on what you’ve chosen to grow you should be ready to harvest from August and well into the autumn.

Pests and diseases:

My biggest problem is always blight and I’m convinced it’s our wetter summers that are to blame. Blight is especially a problem for greenhouse grown tomatoes where the warm and damp can encourage its development, and once it gets going it will develop quickly. The first signs will be brown marks on the leaves, which will spread to the fruit. Make sure you get plenty of ventilation in the greenhouse and if you see anything at all that looks suspiciously like blight remove it as soon as you spot it. Get rid of the diseased plant material by burning or binning, but don’t keep in on your plot. Good housekeeping is your best weapon in the battle against blight and so at the end of the season clean the greenhouse as well as you can so that you get rid of as many spores as possible. If you do get blight a spell of dry weather may well mean that otherwise healthy plants will rally and carry on to develop good fruit for the rest of the season.

White fly and aphids can also be a pest. I prefer not to spray my plants and so I usually try companion planting. Buy a tray of tagetes (French marigolds) and grow them alongside. I grow basil and spring onions in the greenhouse beside the tomatoes as well. This way you’ll deter pests that attack tomatoes and get a crop of basil and spring onions into the bargain.

Onions or any allium will put off all aphids, slugs and snails, marigolds repel aphids and whitefly and the basil is supposed to improve the flavour of the tomatoes and it certainly goes well with them in a salad!

Having said all that I’d better get watering and feeding I guess.

1 Comment

Filed under Garden, vegetables